Construction steps - model-aircraft - AEROSTAR (Trainer).
soh.pt
|

This page has been opened   times. times.
Today is Tuesday, 06 of May of 2025 at 07:48:03 (GMT-Portugal)
|
|
In the model
aircraft construction, for starters, we must verify if we have already made
it before and if we are prepared to make a new one.
Case you never have made it or have doubts, ask for help to sameone that is
already familiar with the subject. This can be easy to get in a store of the
specialty, or still more easy next to a true fan of this sport called
MODEL-AIRCRAFT BUILDING AND FLYING. If none of this work trie here in the InterNet
( (is not my intention to teach nobody here,
but only to show as been elapsed the construction of mine and with what
difficulties i was come across and as I solved them. Hoping to be an aid for
those who like me, desires to construct its own model-aircraft.
Therefore I do not make myself responsible for nothing that can happen fron the
contents of this page. ) |
|
|
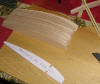
In case that
it is your first model-aircraft I advise to start with a trainer as I present
here, in case that you already have made or bought one, you can and must start
to make that model-aircraft you dream so much about. Presuming that as I, you already
have determined and although already have bought one electric model-aircraft
(orange model-aircraft), I decided to construct a AEROSTAR (white model-aircraft) with
combustion engine. This is the model-aircraft that I will try to describe the
best i can, how the construction was carried throughout some months, in some
free hours elapsed all during the weekends. |
 I started
consulting with my supplier and friend Abel who helped me since the choice
of trainer, how to obtain the plans for construction, tips, ways of construction
until the choice and to run the engine in. Unfortunately and as planed was not
him it who made the first flight because the atmospheric conditions had not
allowed it, but everything was ready. This so waited flight was carried through
two weeks after his visit, for an already and also experienced model-aircraft
building an flying that has helped me in the learning of this sport in the
aerodrome of Castelo Branco, Mr. Emídio and son (Person who has flight his
model-aircrafts thus makeing possible for me to train the flight). I started
consulting with my supplier and friend Abel who helped me since the choice
of trainer, how to obtain the plans for construction, tips, ways of construction
until the choice and to run the engine in. Unfortunately and as planed was not
him it who made the first flight because the atmospheric conditions had not
allowed it, but everything was ready. This so waited flight was carried through
two weeks after his visit, for an already and also experienced model-aircraft
building an flying that has helped me in the learning of this sport in the
aerodrome of Castelo Branco, Mr. Emídio and son (Person who has flight his
model-aircrafts thus makeing possible for me to train the flight). |
|
|


|
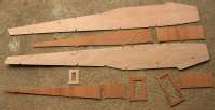
Fuselage scheme.
I hold the scheme and
i glance it, to know more or less what was needed. Holding
the information regarding wich wood was necessáry i start by buying it all:
- Balsa 2mm 7 boards.

- Balsa 3mm 2 boards.
- Balsa 6mm 2 boards.
- Balsa 10mm 1 board.
- Pine laths 4, two for each wing.
- Triangular Balsa 2, one for each aileron.
- plywood 3mm 1 board, to the fuselage.
|
   |
I still bought some
accessories like: rubber bands, Wheels, landing gear iron, fuel tank, spark
plug pipe, fuel tube, hinges for the mobile parts, wire and tube for the
motor controls, wooden man for the helm and depth, front landing gear and
its support, support for engine, support of the servos and servos and
i fixed bicuycle wheel rays for control, among other material that escapes
me of moment.
|
|


|
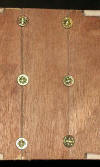
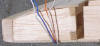
Having all this
I beging to cut off the parts starting for the fuselage. Where I started
making a drawing in the plywood one of the two main parts (Right and Left).
Being carfull to copy the drawing of the plans with the outmost care, in order
not to commit errors in the transposition for the new sheets of paper that I
glue after cut in the plywood. Then with a pencil I marked the contour and
cut it with a gig-saw, but always for the outside of it to prevent to lose
material that later would be important for the part. After having cut the
two parts I placed them side by side and with a thick file I removed the
material left yet. It was not by chance that I placed the two parts side by
side, these parts have to be symmetrical and exactly equal, If it is not the
case we can have serious defects in the fuselage that can imply defects once
the model-aircraft fly. As the plywood very is weighed, I removed some material
of the interior of the parts to made the parts lightest and in special of the
tail of this model-aircraft as i been told is a little weighed. Following the
advice of my friend Abel, and in relation to the original plans i lowered the
angle of attack of the wing in about 1,5Cm for low in the side of the engine.
What the model-aircraft revealed viable therefore does not have as much trend to go
up excessively preventing to give trim in the depth. After these 2 concluded
parts I begin with the parts of the frames. With the same well-taken care of
and cutting towards outside as always, making the finishing with thick lime
and later thiner lime. Afterwords I made a simulation of the fitting in of these
parts in order that these were not too much pressed or too much wide.
Afterwords i have done the same with the tops and bottoms.
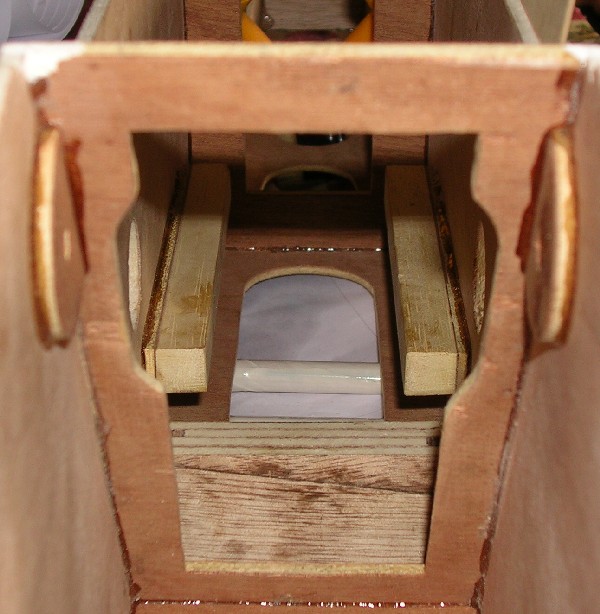
I joined all these
parts including the firewall and tried all the construction before glueing.
I left it to take form during a time in order to absorb the natural curves
of the fuselage. I glue everything with 5 minutes expoxi glue therefore this
part is the one that is more subject to the efforts. Then i glue all the parts
observing that we use strictly the necessary glue therefore this increases
the weight of the model-aircraft.
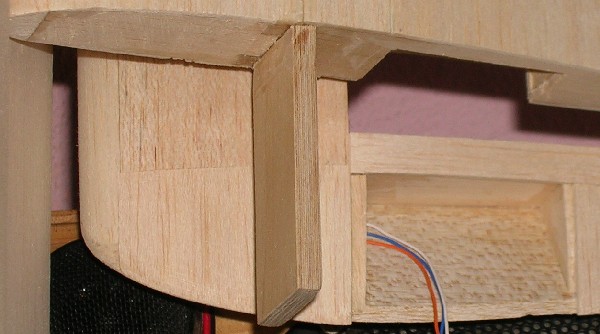
Having glued the fuselage, I made the finishings and I seated the parts for
the servos and landing gears. I still mounted the support of the engine
in firewall and glue these parts in the tip of the fuselage finishing this.
|

|
Afterwords I carried
through the construction of the helm (With some aid of the Abel at the time
when we held the 1st meeting and flight of the "Laranjinha" (litlle orange)
with a new helix for electric motor.) e elevator. Thus seting practically ready the fuselage.
|
| 


|
After these 3 parts
I start the construction of the wing, part that to me seemed to be more complex,
but that it revealed very easy to carry through. Starting for cutting all the
ribbings of the wing, and joining all side by side for later treatment
in order to make it all equal as shows in the plan. I still cut the tips
of the wings and the balsa to cover the wing in the parts indicated in the plan.
I put all parts in top of the leaned laths of pine and to the leading edge in a rude way.
I cut the parts that would go between the ribbings and the equidistant marks
to place the ribbing leaned behind the edge of escape and in the triangular balsa.
I verified if everything incased and glue the ribbings in the laths of pine
in the leading edge and edge of escape (balsa lath both rectangular and triangular)
having the care to underneath place a plate of balsa for the covering of the wing.
In this way I got something like a spine of fish in which after dries,
so it was glued with white glue for wood to be lighter, tneh I glue with aid of pins
the plates previously cut for the covering, leaving short the thus marked areas in the plan.
I cut and made right the parts of the tips of the wing and also glue them with white glue for wood.
in the end I cut the ailerons,placed the wires of control of these and glue everything.
|
|
|
I glue the dihedron
in a half of the wing and essayed with the other measuring the height that
one was to another with one of them leaned in a very straight and smooth table.
Finally I glue the other half with 5 minutes epoxie glue also and the wing was ready.
I open the hole of the servo on the wing and I seated it.
Finally with everything glued
and ready I start to cover the plane with proper screen for the effect and with an
iron for pressing clothes I placed carefuly all the screen of the wing, the elevator,
the ruder and fuselage. I glue the helms in the fuselage and seated the servos and
control of engine and helms. Just in the end and with the aid of the Abel I made the
last retouchings again and he seated the engine, already duly twirled.
|
The engine has to have two types
of inclination, one for the right and another one down, these notes are stamped in the plans.
Finally was verified the weight of the model-aircraft, in this in case it should never
exceed 3kg, and if the wing and helms were well inside of the right position. We made
verifications we call routine checks and we went to the aerodrome track to try to fly the model-aircraft.
Thing that in this day due to the wind became impossible, but anyway we get familiar with other model-aircraft buildres an flyers.
Now is just fill it to the top an fly,
having the care to clean duly after the flights and before these making the routine checks.
|